Showing posts with label play. Show all posts
Showing posts with label play. Show all posts
Saturday, February 14, 2015
Pepsi man direct play game for PC full version

Pepsiman is a game that is very hard to describe.You take control of Pepsiman and collect Pepsi cans while running through hazardous levels dodging obstacles all the way. The game is somewhat rare and hard to find, so consider yourself lucky if you have it.
Gameplay (8/10)
A lot of people are probably asking themselves Who is Pepsiman?. Well, if you dont know who Pepsiman is then why are you reading this? Pepsiman is the spokesman for Pepsi in Japan. You also may remember his cameo in Fighting Vipers for Sega Saturn. Too bad they removed him from the U.S. version. He has starred in many commercials, so why not his own game? The difficulty in this game is average. It shouldnt take too long to beat. The objective is to collect Pepsi cans on the way to the end of the level. You are racing against the clock so be careful not to get hit by a car. There are many obstacles stopping you from getting to your goal. Like cars, people, boxes and many more. There are a total of 4 stages with 3 levels each. Which makes 12 levels in all. Doesnt sound like much does it? You have to remember this game was released in Japan for a somewhat cheap price. The first 2 levels in each stage are played from a 3rd person perspective.
It automatically runs forward for you all you have to do is move Pepsiman left and right and jump over or slide under obstacles. The 3rd level in each stage is played out like the scene in Indiana Jones where that boulder is chasing after him. In these levels Pepsiman is running towards you. The main goal is to collect 100 pepsi cans that are scattered throughout the level. It is not an easy task. While you dont have to get all 100 to beat the game it will be over way too quick if you dont. Read more
System requirements:
No special requirements
Screen Shots: Click on the image to view large
 |  |  |
How to Download
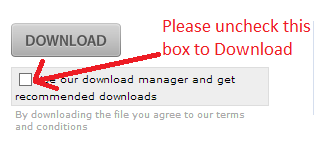 File Size: 10 MB
Pepsi man for PC: Download
I hope you like it....!

Friday, February 13, 2015
HowTo Play sounds in ActivePerl using Win32 Sounds
Playing of sounds using Win32::Sound requires that you play the sound while the perl script is still running.
If the perl script terminates, the playing of sound also terminates.
The sound plays in this example because we are inside the Gtk2 main loop, the script does not terminate instantly because we are waiting for user inputs.
Please take note of the difference between the 2 buttons, SND_ASYNC allows the Gtk2 to loop without waiting for the sound to finish playing.
On the other hand, the one without the SND_ASYNC does not allow the Gtk2 loop to proceed until the sound has finished playing.
#!/usr/bin/perl -w
If the perl script terminates, the playing of sound also terminates.
The sound plays in this example because we are inside the Gtk2 main loop, the script does not terminate instantly because we are waiting for user inputs.
Please take note of the difference between the 2 buttons, SND_ASYNC allows the Gtk2 to loop without waiting for the sound to finish playing.
On the other hand, the one without the SND_ASYNC does not allow the Gtk2 loop to proceed until the sound has finished playing.
#!/usr/bin/perl -w
use strict;
use Gtk2 -init;
use Win32::Sound;
my $window = Gtk2::Window->new();
$window->signal_connect(destroy=>sub{ Gtk2->main_quit();});
my $vbox = Gtk2::VBox->new();
$window->add($vbox);
my $b1 = Gtk2::Button->new("NON BLOCKING");
$b1->signal_connect(clicked=>sub{
Win32::Sound::Play(SystemExclamation,SND_ASYNC);
# Win32::Sound::Play(c:\foobaring.wav,SND_ASYNC);
# you can also use the code above to play your own wav files
});
$vbox->pack_start($b1,0,0,0);
my $b2 = Gtk2::Button->new("BLOCKING");
$b2->signal_connect(clicked=>sub{
Win32::Sound::Play(SystemExclamation);
# Win32::Sound::Play(c:\foobaring.wav);
# you can also use the code above to play your own wav files
});
$vbox->pack_start($b2,0,0,0);
$window->show_all();
Gtk2->main();
Wednesday, February 4, 2015
AS3 Play Sound from Library
Exercise File:
claps.wmv
*Sound loop created by Brad Sucks.
In this tutorial, were going to learn how to use ActionScript 3 in order to control audio files imported into our Flash documents library. This lesson comes with an audio file, which you can download from the link above. The file is named claps.wav, which is a short 4-second sound file that can be used as a sound loop. Well also learn how to loop a sound clips playback in AS3 using the Event.SOUND_COMPLETE event associated with the SoundChannel class.
Step 1
Lets start by creating a new Flash ActionScript 3 Document.
Step 2
On the stage, lets draw 2 buttons - a play button and a stop button. Lets give them the instance names play_btn and stop_btn respectively. You can give a button an instance name by selecting it, and then going to the Properties Inspector where you will find an input field for the instance name.
Step 3
Once you have the buttons, lets go ahead and import the claps.wmv audio file into the Flash documents library. From the main menu, choose File > Import > Import to Library. Navigate to where the claps.wmv file is in your computer and import the file. When importing is done, you should see the audio file in the Flash documents library.
Step 4
At this point, lets set up the sound file in our library so that we will be able to access it using ActionScript. To do that, right-click on the sound file in the library and choose Properties from the context menu that pops up.
When the Sound Properties dialog box comes up, go to the part that says Linkage. If you dont see this area, click on the Advanced button at the bottom of the dialog box. Once you see the Linkage options, make sure that the following are checked:
Step 5
After weve checked those options, youll see a couple of input fields become accessible right below the check boxes. Go to the Class input field and change the name to Claps. This allows us to create a class from our audio file. We will use this class in order to create an instance of our claps.wmv sound file, so make sure you remember this name (Claps) because we will use it later on.
Step 6
Double-check to see if youve set everything up properly and then click on OK. You will then get a message that says: A definition for this class could not be found in the classpath, so one will be automatically generated in the SWF file upon export. Click on OK so that the Claps class will be generated once you export your SWF.
Now that the sound file in our library is properly set up for use with ActionScript, lets go ahead and write some code.
Step 7
Create a new layer for the Actions, select the first keyframe of that layer, and launch the Actions Panel.
Step 8
Lets go ahead and create an instance of the claps.wmv sound. Remember that the class name we specified is Claps. So type the following line in the script pane:
Step 9
Next, lets create mouse click event listeners for our play (play_btn) and stop (stop_btn) buttons:
Step 10
Inside the playSound event listener function, lets use the play() method of the Sound class in order to instruct the sound to start playing once the button is clicked:
Step 11
For stopping the sound, well need to create a SoundChannel object first. And then well need to assign the play sound statement to that SoundChannel. And then to stop the sound, well use the stop() method of the SoundChannel class:
In the next part of this article, well learn how to make the sound clip loop.
Lets go ahead and create the event listener function first. Lets name it loopSound. Inside this listener function, well instruct the sound to play again. So well need to add another play sound statement inside this function:
If youre registering an event listener function to the Event.SOUND_COMPLETE event of the SoundChannel class, you must add the event listener only AFTER the sound has been assigned to the SoundChannel (i.e. it must be added after the SoundChannel = Sound.play(); statement). In our exampe, the first time the sound plays will be when we click on the play button. So we must add the Event.SOUND_COMPLETE statement after the play sound statement inside the playSound() function:
So now, go ahead and test your movie. When you click on the play button, the sound will start playing. And then when it reaches the end, you will see a message from the Output window (from our trace statement), and the sound will immediately play again.
After youve tested the movie and played the sound, you will notice that the sound will only repeat ONCE. After the second time it plays, it will no longer repeat itself. So here, you will realize that the Event.SOUND_COMPLETE listener will only listen out for the event one time. Its not going to keep listening out for Event.SOUND_COMPLETE indefinitely.
But what if we want it to listen out for Event.SOUND_COMPLETE indefinitely so that we can make our sound loop indefinitely as well?
In order to do that, well need to add the event listener AGAIN after it begins playing another time. So well need to add the Event.SOUND_COMPLETE listener inside the loopSound() function as well:
Read more »
claps.wmv
*Sound loop created by Brad Sucks.
In this tutorial, were going to learn how to use ActionScript 3 in order to control audio files imported into our Flash documents library. This lesson comes with an audio file, which you can download from the link above. The file is named claps.wav, which is a short 4-second sound file that can be used as a sound loop. Well also learn how to loop a sound clips playback in AS3 using the Event.SOUND_COMPLETE event associated with the SoundChannel class.
NOTE: WAV files are ideal for sound loops, while MP3 files are NOT. MP3 files are NOT ideal for sound loops because MP3 audio files have a brief moment at the end where there is no sound. So if you loop an MP3 file, you will have these short silent gaps in between each loop that makes the loop sound as if its skipping.
Step 1
Lets start by creating a new Flash ActionScript 3 Document.
Step 2
On the stage, lets draw 2 buttons - a play button and a stop button. Lets give them the instance names play_btn and stop_btn respectively. You can give a button an instance name by selecting it, and then going to the Properties Inspector where you will find an input field for the instance name.
Step 3
Once you have the buttons, lets go ahead and import the claps.wmv audio file into the Flash documents library. From the main menu, choose File > Import > Import to Library. Navigate to where the claps.wmv file is in your computer and import the file. When importing is done, you should see the audio file in the Flash documents library.
Step 4
At this point, lets set up the sound file in our library so that we will be able to access it using ActionScript. To do that, right-click on the sound file in the library and choose Properties from the context menu that pops up.
When the Sound Properties dialog box comes up, go to the part that says Linkage. If you dont see this area, click on the Advanced button at the bottom of the dialog box. Once you see the Linkage options, make sure that the following are checked:
- Export for ActionScript
- Export in frame 1
Step 5
After weve checked those options, youll see a couple of input fields become accessible right below the check boxes. Go to the Class input field and change the name to Claps. This allows us to create a class from our audio file. We will use this class in order to create an instance of our claps.wmv sound file, so make sure you remember this name (Claps) because we will use it later on.
NOTE: This class name is author defined. You can give it any name you want as long as it does not conflict with other class names in your project. The class name is case-sensitive.
Step 6
Double-check to see if youve set everything up properly and then click on OK. You will then get a message that says: A definition for this class could not be found in the classpath, so one will be automatically generated in the SWF file upon export. Click on OK so that the Claps class will be generated once you export your SWF.
Now that the sound file in our library is properly set up for use with ActionScript, lets go ahead and write some code.
Step 7
Create a new layer for the Actions, select the first keyframe of that layer, and launch the Actions Panel.
Step 8
Lets go ahead and create an instance of the claps.wmv sound. Remember that the class name we specified is Claps. So type the following line in the script pane:
var clapsSound:Claps = new Claps();Step 9
Next, lets create mouse click event listeners for our play (play_btn) and stop (stop_btn) buttons:
var clapsSound:Claps = new Claps();

play_btn.addEventListener(MouseEvent.CLICK, playSound);
stop_btn.addEventListener(MouseEvent.CLICK, stopSound)

function playSound(e:MouseEvent):void
{

}

function stopSound(e:MouseEvent):void
{

}
Step 10
Inside the playSound event listener function, lets use the play() method of the Sound class in order to instruct the sound to start playing once the button is clicked:
function playSound(e:MouseEvent):void
{
     clapsSound.play();
}Step 11
For stopping the sound, well need to create a SoundChannel object first. And then well need to assign the play sound statement to that SoundChannel. And then to stop the sound, well use the stop() method of the SoundChannel class:
var clapsSound:Claps = new Claps();
var clapsChannel:SoundChannel = new SoundChannel();

play_btn.addEventListener(MouseEvent.CLICK, playSound);
stop_btn.addEventListener(MouseEvent.CLICK, stopSound)

function playSound(e:MouseEvent):void
{
     clapsChannel = clapsSound.play();
}

function stopSound(e:MouseEvent):void
{
     clapsChannel.stop();
}In the next part of this article, well learn how to make the sound clip loop.
Making a Sound Clip Loop in AS3
If we want to make the sound loop, well need to find a way to be able to tell it to play again once the sound has completed the playback (i.e. when it reaches the end). We can use the SoundChannel class to achieve this. The SoundChannel class has an event called Event.SOUND_COMPLETE. This event gets dispatched whenever a sound thats playing in a SoundChannel has completed playback. So we can create an event listener for this event, and then tell the sound to play again once this event gets dispatched (i.e. tell the sound to repeat when it reaches the end).Lets go ahead and create the event listener function first. Lets name it loopSound. Inside this listener function, well instruct the sound to play again. So well need to add another play sound statement inside this function:
function playSound(e:MouseEvent):void
{
     clapsChannel = clapsSound.play();
}

function stopSound(e:MouseEvent):void
{
     clapsChannel.stop();
}

function loopSound(e:Event):void
{
     clapsChannel = clapsSound.play();
     trace("The sound has reached the end");
}
If youre registering an event listener function to the Event.SOUND_COMPLETE event of the SoundChannel class, you must add the event listener only AFTER the sound has been assigned to the SoundChannel (i.e. it must be added after the SoundChannel = Sound.play(); statement). In our exampe, the first time the sound plays will be when we click on the play button. So we must add the Event.SOUND_COMPLETE statement after the play sound statement inside the playSound() function:
function playSound(e:MouseEvent):void
{
     clapsChannel = clapsSound.play();
     clapsChannel.addEventListener(Event.SOUND_COMPLETE, loopSound);
}So now, go ahead and test your movie. When you click on the play button, the sound will start playing. And then when it reaches the end, you will see a message from the Output window (from our trace statement), and the sound will immediately play again.
After youve tested the movie and played the sound, you will notice that the sound will only repeat ONCE. After the second time it plays, it will no longer repeat itself. So here, you will realize that the Event.SOUND_COMPLETE listener will only listen out for the event one time. Its not going to keep listening out for Event.SOUND_COMPLETE indefinitely.
But what if we want it to listen out for Event.SOUND_COMPLETE indefinitely so that we can make our sound loop indefinitely as well?
In order to do that, well need to add the event listener AGAIN after it begins playing another time. So well need to add the Event.SOUND_COMPLETE listener inside the loopSound() function as well:
function loopSound(e:Event):void
{
     clapsChannel = clapsSound.play();
     clapsChannel.addEventListener(Event.SOUND_COMPLETE, loopSound);
}NOTE: If you want more than one sound clip to loop simultaneously using this method, then youll have to create one SoundChannel for each sound.
And that concludes this tutorial on how to play sound from the library using AS3 and AS3 sound looping
And that concludes this tutorial on how to play sound from the library using AS3 and AS3 sound looping
Tuesday, February 3, 2015
Maxing out at 50 concurrent connections with Play or Netty on OS X Heres a fix
I recently ran across a strange problem with the Play Framework and Netty: on Linux, my Play app could easily handle thousands of concurrent connections; on OS X, the same app maxed out at around 50 concurrent connections. It took a while to figure out the problem, so in this post, Im documenting the solution in case other folks run into the same issue in the future. Note: if youre using raw Netty, the fix is very straightforward; if youre using Play, its much trickier, and I hope it will be fixed in Play itself in the near future.
tldr: set the backlog option on Nettys Bootstrap object to a higher value (example).
Symptoms
On OS X, your Play or Netty app cannot handle more than ~50 concurrent connections. A simple way to test this is to use Apache Bench:
As soon as you set the concurrency level (the -c parameter) above 50, youll get the error "apr_socket_recv: Connection reset by peer (54)". Moreover, your Play or Netty app will never actually see the request and nothing will show up in the logs.
However, if you run the same experiment against the same app running on Linux, even with the concurrency level set to several hundred or several thousand, all requests will complete successfully, without errors. Therefore, there must be something OS specific causing this problem.
To be fair, its rare to use OS X in any production or high traffic capacity - for example, at LinkedIn, we use OS X in dev, but Linux in prod - so the concurrency limitation is rarely a problem. However, we had a few use cases where, even in dev mode, we had to make many concurrent calls to the same app, so we had to find a solution.
The Cause
It turns out that "50" is the default size for the "backlog" parameter in Javas ServerSocket. It is even explained in the JavaDoc:
The Solution (pure Netty)
After some more digging, this StackOverflow thread reveals that the Netty ServerBootstrap class lets you set an option to override the backlog:
If youre using pure netty, just use the code above and the 50 concurrent connections limit will vanish immediately!
Also worth noting: this issue exists in Netty 3.x, but apparently Netty 4.x sets a better default than 50 on all OSs, so upgrading Netty versions may be another solution.
The Solution (Play)
Play instantiates the ServerBootstrap class inside of NettyServer.scala. Unfortunately, neither the class nor the boostrap instance inside of it are accessible to app code. This should be easy to fix via a pull request, but until that happens, and until a new version is available, here is a two part workaround to get moving.
Note: this is an ugly hack with lots of copy/paste from the original Play source code and is only meant as a temporary workaround. It has been tested with Play 2.2.1; figure out which version of Play youre on and be sure to use code from that release!
Step 1: make a local copy of NettyServer.scala called TempNettyServer.scala
Youll want to put TempNettyServer.scala in a different SBT project than your normal app code - that is, dont just put it in the app folder. See SBT Multi-Project Builds for more info.
The folder structure looks something like this: my-app is my original Play app and monkey-patch is a new SBT project for TempNettyServer.scala:
Copy the contents of the original NettyServer.scala into TempNettyServer.scala, with two changes:
Now, configure this new SBT project in project/Build.scala:
Step 2: override the run and start commands to use TempNettyServer
Ready for more copy/paste?
Grab PlayRun.scala and copy it into the project folder under some other name, such as TempPlayRun.scala and make two changes:
A note on OS limits
After making the changes above, you should be able to handle more than 50 concurrent connections. However, depending on how your OS is configured, you might still hit a limit at 128 or so. This is probably due to the kernel config kern.ipc.somaxconn, which controls "the size of the listen queue for accepting new TCP connections" and has a default of 128.
To tweak this limit, you can run the following command:
Your Netty or Play app should now be able to handle over 1000 concurrent connections (or more, depending on what limits you set above).
Read more »
tldr: set the backlog option on Nettys Bootstrap object to a higher value (example).
Symptoms
On OS X, your Play or Netty app cannot handle more than ~50 concurrent connections. A simple way to test this is to use Apache Bench:
As soon as you set the concurrency level (the -c parameter) above 50, youll get the error "apr_socket_recv: Connection reset by peer (54)". Moreover, your Play or Netty app will never actually see the request and nothing will show up in the logs.
However, if you run the same experiment against the same app running on Linux, even with the concurrency level set to several hundred or several thousand, all requests will complete successfully, without errors. Therefore, there must be something OS specific causing this problem.
To be fair, its rare to use OS X in any production or high traffic capacity - for example, at LinkedIn, we use OS X in dev, but Linux in prod - so the concurrency limitation is rarely a problem. However, we had a few use cases where, even in dev mode, we had to make many concurrent calls to the same app, so we had to find a solution.
The Cause
It turns out that "50" is the default size for the "backlog" parameter in Javas ServerSocket. It is even explained in the JavaDoc:
The maximum queue length for incoming connection indications (a request to connect) is set to 50. If a connection indication arrives when the queue is full, the connection is refused.Therefore, whatever code manages sockets in Netty must use different configurations for the backlog parameter on Linux and OS X. This code is likely tied to the selector implementation for the OS: Im guessing the Linux version uses epoll, while OS X uses kqueue. The former probably sets backlog to some reasonable value (perhaps from OS settings) while the latter just uses the default (which is 50).
The Solution (pure Netty)
After some more digging, this StackOverflow thread reveals that the Netty ServerBootstrap class lets you set an option to override the backlog:
If youre using pure netty, just use the code above and the 50 concurrent connections limit will vanish immediately!
Also worth noting: this issue exists in Netty 3.x, but apparently Netty 4.x sets a better default than 50 on all OSs, so upgrading Netty versions may be another solution.
The Solution (Play)
Play instantiates the ServerBootstrap class inside of NettyServer.scala. Unfortunately, neither the class nor the boostrap instance inside of it are accessible to app code. This should be easy to fix via a pull request, but until that happens, and until a new version is available, here is a two part workaround to get moving.
Note: this is an ugly hack with lots of copy/paste from the original Play source code and is only meant as a temporary workaround. It has been tested with Play 2.2.1; figure out which version of Play youre on and be sure to use code from that release!
Step 1: make a local copy of NettyServer.scala called TempNettyServer.scala
Youll want to put TempNettyServer.scala in a different SBT project than your normal app code - that is, dont just put it in the app folder. See SBT Multi-Project Builds for more info.
The folder structure looks something like this: my-app is my original Play app and monkey-patch is a new SBT project for TempNettyServer.scala:
Copy the contents of the original NettyServer.scala into TempNettyServer.scala, with two changes:
- Replace all NettyServer references to TempNettyServer
- In the newBootstrap method, make the change below to allow configuring the backlog option
Now, configure this new SBT project in project/Build.scala:
Step 2: override the run and start commands to use TempNettyServer
Ready for more copy/paste?
Grab PlayRun.scala and copy it into the project folder under some other name, such as TempPlayRun.scala and make two changes:
- Replace all PlayRun references with TempPlayRun: there should only be one, which is the class name.
- Replace all NettyServer references with TempNettyServer: there should two, both in String literals, used in the "run" and "start" commands to fire up the app.
A note on OS limits
After making the changes above, you should be able to handle more than 50 concurrent connections. However, depending on how your OS is configured, you might still hit a limit at 128 or so. This is probably due to the kernel config kern.ipc.somaxconn, which controls "the size of the listen queue for accepting new TCP connections" and has a default of 128.
To tweak this limit, you can run the following command:
Your Netty or Play app should now be able to handle over 1000 concurrent connections (or more, depending on what limits you set above).
Subscribe to:
Posts (Atom)